Thursday, December 17, 2009
Christmas Goodies!
I'm back! I apologize for not posting anything in over a month! Things have been pretty crazy around here. I moved into a house a couple of weeks ago, and consequently all of my hobbies have been put on hold for awhile. I finally feel like I am unpacked (sorta) now, and am getting into a routine again.
There are also a couple of other reasons to why I haven't posted. Mainly, I'm not sure in what direction I want to take this blog. I have yet to find a unique stride. I wanted this to be more than a copy and paste recipe blog, but I'm lazy and that's pretty much what it is.
Also, I really REALLY want a new camera. My camera is old, and it's really not taking quality pictures. So, I feel like the pictures of my food aren't pretty and make the food look disgusting, and I'm just not that talented (or patient) enough to sit and fix every picture in photoshop before posting. Is that petty?
So-- I want to hear your suggestions. What do you like about this blog? Do you like the easy recipes? Or the tales of myself trying to tackle the more difficult ones? Are you a fan of step-by-step pictures? Or do you just like the recipe to be posted?
I do think it would be fun to have you guys (does anyone read this?) email me your favorite recipes to try. So send me some, please! It would be way more fun to try one of your recipes once a week than it would be hunting for recipes on the internet!
If nothing else, this blog did what I set it up to do. I used to loathe cooking, and now I absolutely LOVE it! I am always in my kitchen making goodies, or cooking a delicious dinner. It's the best part of my day!
Yesterday I made some Christmas goodie plates for my friends and neighbors. Below I have posted 3 of the recipes I made. I also made homemade caramels, which, thanks to a candy thermometer, turned out PERFECT this time!
The cookies you see are my friend Alicia's Mom's cookie recipe. I grew up on these. Whenever Alicia and I were bored, we'd go into the kitchen and whip up a batch of these magnificent cookies. For my wedding, Alicia gave me the recipe as a wedding gift. It's been my cookie recipe ever since, and I'm just not ready to part with it. Sorry.
Anyway-- let me know what you guys think! I need some advice!
Butterscotch Haystacks
Cook time: 10 minutes
Yield: about 3 dozen stacks
Ingredients:
- 1 (11 ounce) package butterscotch flavored morsels
- 3/4 cup creamy peanut butter
- 2 (5 ounce) cans chow mein noodles
- 3 1/2 cups miniature marshmallows
Line baking sheets with waxed paper. In a large pot melt morsels over medium high heat. Stir constantly. When melted, remove from heat and add in peanut butter. Stir until smooth. Stir in chow mein noodles and marshmallows. Drop by spoonfulls onto waxed paper. Refridgerate until ready to serve.
Peppermint Bark
Cook time: 5 minutes
Ingredients:
1 bag of white chocolate chips
peppermint candies, smashed (I used 3 candy canes)
Place peppermint candies into a ziploc bag. Take your rolling pin and smash the crud out of them. Pour white chocolate chips into a microwavable bowl. Microwave in 30 second intervals until chips are melted. Stir in smashed peppermint candies. Pour onto wax paper and let cool. When cool, use your hands to break into bite size pieces.
Creamy Chocolate Fudge
Ingredients:
- 1 (7 ounce) jar marshmallow creme
- 1 1/2 cups white sugar
- 2/3 cup evaporated milk
- 1/4 cup butter
- 1/4 teaspoon salt
- 2 cups milk chocolate chips
- 1 cup semisweet chocolate chips
- 1/2 cup chopped nuts
- 1 teaspoon vanilla extract
- Line an 8x8 inch pan with aluminum foil. Set aside.
- In a large saucepan over medium heat, combine marshmallow cream, sugar, evaporated milk, butter and salt. Bring to a full boil, and cook for 5 minutes (or until a candy thermometer reads 240--I recommend this method! It takes a bit longer than 5 minutes!), stirring constantly.
- Remove from heat and pour in semisweet chocolate chips and milk chocolate chips. Stir until chocolate is melted and mixture is smooth. Stir in nuts and vanilla. Pour into prepared pan. Chill in refrigerator for 2 hours, or until firm.
Wednesday, November 4, 2009
Perfect Apple Pie
Not the best. (Plus, I had some crust issues. ) So I probably won't be posting as many pictures. Unless I made food during the day when there is still enough natural light to take a decent picture.
Anyway--want to make this yummy pie? Here's the recipe:
- 1 recipe pastry for a 9 inch double crust pie (I made the Pioneer Woman's Perfect Pie Crust--very delicious)
- 1/2 cup unsalted butter
- 3 tablespoons all-purpose flour
- 1/4 cup water
- 1/2 cup white sugar
- 1/2 cup packed brown sugar
- 8 Granny Smith apples - peeled, cored and sliced
- Preheat oven to 425 degrees F (220 degrees C). Melt the butter in a saucepan. Stir in flour to form a paste. Add water, white sugar and brown sugar, and bring to a boil. Reduce temperature and let simmer.
- Place the bottom crust in your pan. Fill with apples, mounded slightly. Cover with a lattice work of crust. Gently pour the sugar and butter liquid over the crust. Pour slowly so that it does not run off.
- Bake 15 minutes in the preheated oven. Reduce the temperature to 350 degrees F (175 degrees C). Continue baking for 35 to 45 minutes, until apples are soft.
Pulled Pork Sandwiches
Yeild: about 8 sandwiches
1 2lb pork piece (any cut will do, I think I bought sirlion)
1 12oz can root beer
1 18oz bottle of your favorite barbeque sauce
hambuger buns, toasted
Place pork in crockpot, cover with root beer and cook on low until pork shreds easily, about 5-6 hours. Take pork out of the crockpot to shred. Drain the remaining root beer. Place shredded pork back in crockport and add barbeque sauce, continue cooking on low for another hour or until ready to serve.
Lightly (or heavily, if you've had a rough day) butter the hambuger buns and place then on a heated skillet to toast.
Serve the bbq pork on the hamburger buns. Enjoy! We loved these sandwiches- they are definitely going in the dinner rotation!
The Best Cheeseball Ever
I brought this cheese ball to a Halloween party and everybody loved it! It is seriously so yummy, you'll have everyone asking you for the recipe. I did!
Yield: 1 cheeseball
2 (8oz) packages cream cheese, softened
1 package dry ranch dressing mix
1 1/2 cups shredded cheddar cheese
REAL bacon bits
chopped pecans
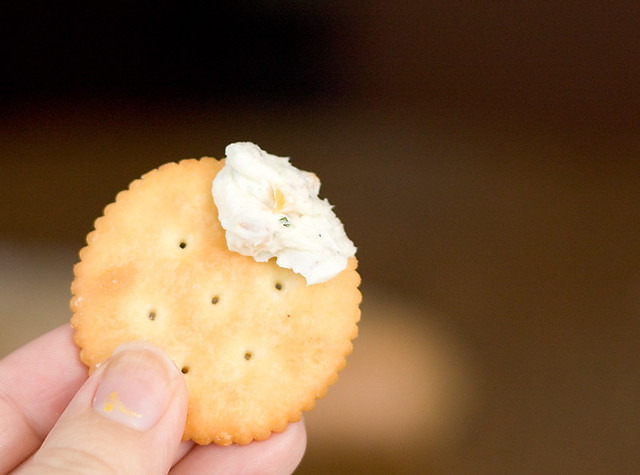
Mash up the cream cheese until smooth. Add dressing mix, cheese, and bacon bits. Shape into a ball and roll in chopped pecans. Serve with crackers.
I did use real bacon in mine, and I think it really made this cheese ball delicious! The ranch dressing also adds wonderful flavor. Try this one. You'll love it! I promise.
Tuesday, October 20, 2009
Pumpkin Cream Pie
Ingredients:
2 cups cold milk
2 (3.5 oz) packages vanilla instant pudding mix
1 cup canned pumpkin
1 teaspoon pumpkin pie spice
1 cup whipped topping
1 9 inch pie crust, baked and cooled
Yes I did make my own pie crust! It turned out really tasty, just not too pretty. I'll have to practice. I'm not going to post the recipe-- just go HERE. You won't be disappointed.
Directions:
Combine milk, pudding mix, pumpkin, spices, and whipped topping in a large bowl.
Beat at lowest speed for about 1 minute.
Pour filling into cooled pie shell.
Chill until set, at least 3 hours.
Top with whipped cream!
I love this pie! It's so EASY! And delicious too!
Pumpkin Butter
These measurings are very approximate. I was just throwing the ingredients together trying to make something delicious!
1/4 cup melted butter
1/2 cup pumpkin puree
1/2 teaspoon pumpkin pie spice
1 cup (?) powdered sugar
Adjust the ingredients until it tickles your fancy. I think I may have used more than a cup of sugar (maybe two?), and more like a teaspoon of the spice.
Perfect Cornbread
1 1/2 cups cornmeal
2 1/2 cups milk
2 cups flour
1 tablespoon baking powder
1 teaspoon salt
2/3 cup sugar
2 eggs
1/2 cup vegetable oil
Directions:
- Preheat oven to 400 degrees F (200 degrees C). In a small bowl, combine cornmeal and milk; let stand for 5 minutes. Grease a 9x13 inch baking pan.
- In a large bowl, whisk together flour, baking powder, salt and sugar. Mix in the cornmeal mixture, eggs and oil until smooth. Beat on low speed for 2 minutes. Pour batter into prepared pan.
- Bake in preheated oven for 30 to 35 minutes, or until a knife inserted into the center of the cornbread comes out clean.
Chili con Carne
1 onion, chopped
1 clove garlic, diced
2 teaspoons tomato paste
2 tablespoons butter
2 tablespoons flour
1 teaspoon oregano
1/2 teaspoon cumin
1 1/2 teaspoons chili powder
1/2 teaspoon cayenne pepper
1 14 oz can diced tomatoes
1 lb ground beef
1 15 0z can kidney beans
salt and pepper to taste
Directions:
- In a large skillet over medium heat, combine onion, garlic, and tomato paste. Cover and cook for 5 minutes.
- Stir in butter until melted. Stir in flour, oregano, cumin, chili powder, tomatoes and beef. Cook uncovered for 8 minutes, stirring occasionally.
- Stir in the beans and cook for another 4 minutes, stirring occasionally. Salt and pepper to taste.
--This recipe was super easy and was very tasty! You may want to add more spices. I added more of the spices than the recipe called for, but I like my chili spicy with a lot of flavor. So start with what is written, then add more chili powder, cayenne, cumin, salt, pepper...until it tastes the way that you want it! Also--I didn't have kidney beans so I used black beans instead. It still tasted great!
Tuesday, October 13, 2009
Homemade Caramels
Make your own!
Today I decided to make caramels. They are always my favorite candy, so I thought I would try it out.
Ingredients
1 cup butter
1 lb light brown sugar
1 14oz can sweetened condensed milk
1 cup light corn syrup
1 pinch salt
1 1/2 teaspoons vanilla extract
Directions:
In a heavy bottomed saucepan over medium heat, combine the butter, brown sugar, sweetened condensed milk, corn syrup and salt. Look I even painted my nails Halloween orange for the occasion!
Bring to a boil, stirring constantly.
Heat to between 234 and 240 degrees F (112 to 116 degrees C), or until a small amount of syrup dropped into cold water forms a soft ball that flattens when removed from the water and placed on a flat surface. Cook for 2 minutes at that temperature. Remove from the heat and stir in vanilla.
--Okay I tried this. I didn't have a candy thermometer, so I thought I would use the cold water trick. I thought it had got to this stage- but I really should have cooked it longer. My caramels are delicious, but they have to be chilled to be the right consistency. If they are at room temperature, they get way too soft. So-- I love this recipe- but the next time I make it-- I will be investing in a thermometer.
Meanwhile, butter a 9x13 inch baking pan. (I used my cake pans because my 9x13 was dirty and I was feeling too lazy to wash it. Plus- I didn't have time, the caramel was boiling!) When the caramel is ready, pour into the buttered pan.
Isn't it pretty?
Allow to cool completely at room temperature. Remove from the pan and cut into squares using scissors. Wrap individual pieces in waxed paper or cellophane.
Monday, October 12, 2009
The Best Cinnamon Rolls. Ever.
I am so excited that it is finally fall! For some of you it's been fall for awhile, but here in the valley it just barely started cooling down. With this wonderful cooler weather brings wonderful fall food! I have a lot of recipes I'm so excited to try. I will also be trying out lots of Thanksgiving recipes and posting the good ones on here, so everyone will know what to bring for Thanksgiving dinner! This will result in a lot of extra food, so please come and visit me and I will feed your hungry belly.
On Friday I made cinnamon rolls. I finally decided to give up on my recipe that I've had since Freshman Home Economics, and find something better (sorry Mrs. Miller). And boy did I find something better! These are the best cinnamon rolls I have ever made! Probably the best I've ever had. Except for, you know, Cinnabon. But who can compete with a 2,000 calorie roll?
Once again this recipe is based off of The Pioneer Woman's recipe. I say based, because I changed a few things, but it's basically the same. I also just pre-ordered her book!! I'm so excited! She's changed my life forever.
Okay here we go...
Ingredients:
2 cups whole milk
1/2 cup vegetable oil
1/2 cup sugar
1 package Active Dry Yeast
4 + 1/2 cup flour
1/2 tsp baking powder
1/2 tsp baking soda
1/2 tablespoon of salt
3/4 cup (or more) melted butter
another 1/2 cup of sugar
generous sprinkling of cinnamon
Frosting:
1/2 bag powdered sugar
1 tsp vanilla
1/4 cup milk
1/4 cup melted butter
pinch of salt
Directions:
Mix milk, oil and sugar in a large pot. "Scald" the mixture (heat until just before the boiling point.) Turn off heat and leave to cool 45 minutes to 1 hour.
When the mixture is cool enough but still warm, add your yeast and let it work
Stir in 4 cups of flour. Then cover and let rise for about an hour.
After the dough has risen add 1/2 cup flour, baking powder, baking soda and salt. Stir mixture together.
At this point my friend Alicia called me, so I put my dough in the refrigerator for about an hour. You could put this dough in the fridge for up to two days if you wanted to. But who wants to do that?
Roll out dough into a rectangular shape. Look! I finally bought a rolling pin! In my five years of marriage I've never bought a rolling pin. It works so much better than a cup! I was singing the hallelujah chorus.
Pour on the melted butter. Don't be shy-- we all know butter makes the world better. I think butter should win the Nobel Peace Prize.
Sprinkle on sugar (the recipe says 1/2 cup, but use as much as you need! I think I used closer to 1 cup of sugar), and a very generous sprinkling of cinnamon. Be even more generous than this. I think my rolls could have use more.
Now run and get a piece of thread or dental floss. Roll up your dough, and pinch the seam. Use the thread to cut the dough. I really should have taken a picture of this part. If you've never done this before and you have no idea what I'm talking about, call me and I'll explain it to you. Or just use a sharp knife.
Place rolls in pans.
Let them rise for 20-30 minutes, then bake at 400 degrees for 15-18 minutes. Or until light golden brown.
Meanwhile mix up the frosting...
and pour it over warm cinnamon rolls.
Mmmm...
Enjoy!
Sunday, October 11, 2009
Yummy Buttery Breadsticks
I love these breadsticks.
These breadsticks are buttery, garlicky, fluffy and delicious. I would like to share them with you. In fact, I still have some in my kitchen. So really, come on over!
Ingredients:
1 1/2 cup warm water
1/4 c. sugar
1 1/2 tablespoons yeast. (I like to use a little extra yeast because I think it makes the breadsticks fluffier, but I could be completely wrong about that.)
About 4 cups of flour
Topping:
1/4 cup mayo
1/4 cup butter (softened)
1/4 cup Parmesean cheese (if your husband is normal and likes cheese. I unfortunately have to skip this ingredient *angry face* )
1/2 tsp salt
1 tsp garlic powder
Italian seasoning sprinkled on top
Directions:
Mix water and sugar, add yeast and let work about 10 minutes.
Add 3 1/2 cups flour, then add flour as needed to create a soft dough. Cover with plastic wrap and let rise in a warm place for about 20 minutes.
Grease pan.
Spread dough in pan. I like to use a 9x13 because I like really thick breadsticks, but if you wanted thinner ones, use a cookie sheet. Let rise for another 20 minutes.
Meanwhile, mix up the topping. I'm going to be honest with you here. Is that okay? I actually DOUBLE the topping recipe. I love this stuff! I also use more garlic than I should. I like my breadsticks really garlicky. So start with what I said, and then add more to taste.
Gently cut were pieces will be, but do not cut all the way through.
I don't know why I decided to only make 6 HUGE breadsticks. I easily could have made a dozen. Don't questions my motives, it's not like the size of the breadstick does anything to the taste.
Spread on topping (don't be shy!) and sprinkle italian seasoning on top. Bake for 9-10 minutes at 400 degrees.
And yes, Tia, (if you ever read this) this is your mom's recipe. I still have it from when we exchanged recipes in Young Womens right before we all went to college. It has served me well over the years.
Thank you.
And thank your mom for me.
Wednesday, October 7, 2009
Monkey Bread!
I LOVE breakfast food. We have breakfast for dinner at least once a week at my house. This is definitely going in the rotation!
I love trying out The Pioneer Woman's recipes. They are all so yummy! For step-by-step instructions and pictures, click HERE.
Ingredients:
* Brown Sugar // 1/2cup will be needed
* 2 sticks of butter (1 cup)
* Bundt Cake Pan (feel free to use dorky shapes)
* Cinnamon // 2-3 teaspoons
* 3 cans of Buttermilk Biscuits (the non-flaky ones)
* Sugar! // 1 cup
The best part of this recipe is that it only looks hard to make, it's really really easy, and probably the best thing you'll ever eat.
Cut the biscuits into quarters.
Place the cinnamon and sugar in a gallon bag.
Put the biscuits in the bag and give it a good shaking.
Place covered biscuits into a bundt pan. I used a cake pan because I don't own a bundt ("Oh, it's a cake!"). I had to use 2 cake pans for all the dough, and even then I had extra.
Melt butter in saucepan, add brown sugar and cook until it's become one color.
Poor over biscuits. It's going to look like way to much, but it'll be worth it in the end.
Bake at 350 for 30-40 minutes, or until crust is a deep golden brown.
ENJOY!!!
Crockpot Chicken and Dumplings
Here's a super easy, super yummy recipe for the cooler fall days.
Ingredients:
2 boneless skinless chicken breasts
2 tablespoons butter
1 can cream of chicken soup
1/2 onion, diced
water to cover
1 can pillsbury biscuit dough
Place frozen chicken breasts, butter, soup,onion and water in a crockpot and cook on low 5-6 hours or high for 3-4. When the chicken is cooked enough to shred apart easily do so. Not too much, you want chunks of chicken. During the last hour of cooking, tear apart the biscuit dough and place it on the top of the soup mixture. Cook until the dough is no longer raw in the center.
Tuesday, September 29, 2009
Banana Pudding Cake and Cream Cheese Frosting
Ingredients:
- 1 (18.25 ounce) package yellow cake mix
- 1 (3.5 ounce) package instant banana pudding mix
- 4 eggs
- 1 cup water
- 1/4 cup vegetable oil
- 3 mashed bananas
- Preheat oven to 350 degrees F (175 degrees C). Grease and flour the cake pan of your choice.
- In a large bowl, stir together cake mix and pudding mix. Make a well in the center and pour in eggs, water, oil and mashed bananas. Beat on low speed until blended. Scrape bowl, and beat 4 minutes on medium speed. Pour batter into prepared pan(s).
- I always use the back of the recipe box as a guide for baking. It usually is plenty of time, even with the extra ingredients.
I let the cakes cool, and then I made this Cream Cheese Frosting recipe:
1 8oz cream cheese, softened
1/4 butter, softened
1 teaspoon vanilla
1 8oz whipped cream, thawed
2 cups powdered sugar
Blend the cream cheese and butter until smooth. Add vanilla and whipped cream. Slowly add the powdered sugar.
I'm not the biggest fan of cream cheese frosting, but this was really yummy. The only problem with it was that it was kind of runny. I had a really hard time frosting my cake with this. It would have been fine if I just had baked a 9x13, but I did a layered cake and it was all coming off. So next time I'll chill the frosting, or I'll increase the sugar and decrease the whipped cream.
Yummy! It's not the best picture, but I couldn't take a picture of the whole cake, the frosting was ugly remember? Just trust me that it turned out tasting scrumptious in the end.
I think the next time I make this cake, I'm just going to to a simple glaze rather than the cream cheese frosting.
Tuesday, September 22, 2009
Beignets
About a year and a half ago Dustin and I took a trip to Disneyland. Just the two of us went, and those 3 days were some of the funnest days of our marriage. We discovered this little restaurant in the park called Cafe Orleans. We went there EVERY DAY and got the same meal. Gumbo, seasoned french fries and mickey mouse shaped beignets.
Beignets are basically dougnuts, and they are so *SO* good. At Disneyland they served them with a vanilla cream sauce and a raspberry sauce for dipping. I didn't make either (got to watch those calories right?) but I will definitely be looking for a recipe for the next time I make these bad boys.
This recipe makes a TON. Cut it in half and you'll have plenty!
Also- my photobucket account was acting up so you get smaller pictures for this post.
SORRY.
Ingredients:
- 1/2 cup water
- 1 tablespoon yeast
- 1/4 cup shortening
- 1/2 cup sugar
- 1 teaspoon salt
- 1 cup boiling water
- 1 cup evaporated milk
- 2 eggs, beaten
- 7 1/2 cups flour
- 1 quart vegetable oil for frying
- 1 cup confectioners' sugar for dusting
Directions:
- Pour 1/2 cup room temperature water into a small bowl. Sprinkle the yeast over the water and let stand for about 5 minutes to dissolve.
- Combine the shortening, sugar, and salt in a large bowl. Pour the boiling water over the shortening mixture and then stir in the evaporated milk. Wait for the mixture to cool down until it is lukewarm. Then, add the yeast and water mixture and beaten eggs.
- Slowly mix in the flour until the dough forms a ball. Cover the dough with plastic wrap and refrigerate for 30 minutes to 1 hour.
- Working with a small portion (a little larger than a baseball) at a time, roll out the dough 1/8-inch thick. Cut the rolled out dough into strips 2 to 3-inches wide, then cut again in the opposite direction and at an angle, making diamond shapes.
- Heat your oil for frying in a deep and wide, heavy-bottomed skillet over medium-high heat to 360 degree F (180 degrees C).
- Slide dough slowly into the oil to avoid splattering and deep fry until they puff up and are golden brown, 3 to 5 minutes. Carefully remove onto a rack with paper towels underneath and allow to cool until you can handle them. Place in a clean paper bag with confectioners' sugar and shake gently until covered generously or, use a sifter to dust the beignets with powdered sugar.
I served these with Progresso Gumbo. haha. I will definitely be making homemade gumbo sometime soon. I love New Orleans food!
Thursday, September 17, 2009
Grilled Chicken Pasta in a Tomato Cream Sauce
Sorry that I haven't posted anything in awhile. We didn't have the money to go grocery shopping last week, so I didn't have any ingredients to make anything new!
This pasta was so delicious. I've never cooked with fresh herbs before, and they adding such amazing flavor, that it inspired me to grow my own herb garden. I will definitely be doing that sometime in the future, so be watching for a post on that.
On to last night's dinner:
1 lb boneless, skinless chicken breasts
Montreal Steak seasoning
1/2 pound penne pasta
2 tablespoons butter
2 tablespoons olive oil
2 cloves garlic, minced
½ cup chicken broth
1 (8-ounce) can tomato sauce
1 cup heavy cream
1/2 to 1 tsp salt & pepper (to taste)
1 tablespoon fresh parsley, chopped
6-8 fresh basil leaves, chiffonaded*
Rinse chicken breasts in cold water. Layer between sheets of wax paper and pound to even thickness. Season both sides with Montreal Steak seasoning. Preheat grill for medium high heat, lightly oil grate, and grill chicken breasts on medium high heat for 6-8 mins each side.
OR heat 2 tbsp butter & 2 tbsp olive oil in a large skillet over medium heat. Once the butter and olive oil is nice and hot, add chicken breasts and cook 5 mins each side.
Set chicken aside to cool.
In a large pot, boil water with 1 tbsp salt. Add 1/2 lb penne pasta noodles and boil according to package directions.
Heat 2 tablespoons butter and 2 tablespoons olive oil in the skillet over medium heat. Add the garlic and cook, stirring occasionally, until garlic is tender, but do not let the garlic turn brown (about 3-5 mins).
Add the chicken broth to the pan and allow to reduce by half. Meanwhile, slice chicken.
Once the broth has reduced, stir in tomato sauce. Add the heavy cream and stir well to combine. Season with salt and pepper to taste. Turn heat to low.
Chop the parsley and basil, add to sauce and mix well. Drain pasta and add to sauce. Stir well to coat. Serve pasta on plates, top with sliced chicken.
*If you're wondering what chiffonaded means, it means to stack the basil leaves on top of one another, roll them up (like you're a kid making a telescope out of paper) and thinly slice the leaves.
Also I got this recipe from kevinandamanda.com. She takes beautiful step-by-step pictures, so be sure to check it out HERE!
Thursday, September 3, 2009
Barbeque Chicken Pizza!
Ingredients:
- 1 tablespoon sesame oil
- 1 skinless, boneless chicken breast half
- 1/4 cup barbeque sauce, divided
- 1/2 cup marinara sauce
- 1 (16 ounce) package pre-baked pizza crust
- 1 cup shredded mozzarella cheese
- 1/3 cup thinly sliced red onion
- 2 tablespoons chopped fresh cilantro
- Heat the sesame oil in a skillet over medium heat. Place the chicken breast in the skillet, and top with 1 tablespoon barbeque sauce. Cook 10 minutes, turn, and top with 1 tablespoon barbeque sauce. Continue cooking 10 minutes, until juices run clear. Cool slightly, and cut into chunks.
- Preheat oven to 425 degrees F (220 degrees C).
- In a small bowl, mix the remaining barbeque sauce and marinara sauce. Spread evenly over the pizza crust. Sprinkle with mozzarella cheese. Arrange cooked chicken chunks and red onion slices over the top.
- Bake 15 minutes in the preheated oven, or until cheese is melted and bubbly. Remove from heat, sprinkle with cilantro, and let sit 10 minutes before slicing.
For dessert, I made the Dangerously Delicious Chocolate Cake again. I once again made the Buttercream Frosting, but for some reason this time it wasn't as good. It wasn't as sweet for some reason, although I swear that I made it the exact same as I have been making it. I don't know, maybe I spaced and forgot a cup of sugar or something. Oh well, it's still good, just a little more buttery tasting than last time.
Also I was so busy trying to get everything ready for company to come over, that I forgot to snap a picture of the pizza. Silly me.
Everyone loved everything!!! I feel so proud of myself. Sherice even had a second slice of cake, and she hates chocolate. That's saying something right?
Tuesday, September 1, 2009
Guacamole
3 avocados
6-8 oz cream cheese
1 lime, juiced
1 teaspoon salt
1/2 cup diced onion
3 tablespoons chopped fresh cilantro (my favorite ingredient!)
2 roma tomatoes, diced
1 teaspoon minced garlic
1 pinch ground cayenne pepper
In a medium bowl, blend together the cream cheese and mashed avocados with a hand mixer. The cream cheese helps you to make more guacamole without having to by a ton of avocados and it make it really smooth and yummy. Mix all other ingredients in and refrigerate for an hour for best flavor, or serve immediately.
Monday, August 31, 2009
Crockpot Refried Beans
3 cups dry pinto beans, rinsed
1/2 fresh jalenpeno pepper, seeded and chopped
2 tablespoons minced garlic
1 3/4 teaspoons fresh ground black pepper
1/8 teaspoon ground cumin
9 cups water
Place everything in crockpot and stir to combine. Cook on high for 8 hours.
Once the beans have cooked, strain them and reserve the liquid. Mash the beans with a potato masher, adding the reserved water as needed to attain desired consistency.
--These beans were really good. The recipe originally included 5 teaspoons of salt, but they turned out REALLY salty. It was fine because they went into burritos that were topped with guacamole, so it wasn't that noticeable, but you definitely couldn't eat them plain. So next time I won't add it at all. Well, maybe just a little, but not 5 teaspoons. Plus my mom told me that adding salt can sometimes make your beans turn out hard, so maybe just salt to taste at the end.
Mexican Rice
Ingredients:
3 tablespoons vegetable oil1 cup uncooked long-grain rice
half a packet of taco seasoning
1/4 cup chopped onion
1/2 cup tomato sauce
2 cups chicken broth
Directions:
Heat oil in a large saucepan over medium heat and add rice. Cook, stirring constantly, until puffed and golden. While rice is cooking, sprinkle with taco seasoning.
Stir in onions and cook until tender. Stir in tomato sauce and chicken broth; bring to a boil. Reduce heat to low, cover and simmer for 20 to 25 minutes. Fluff with a fork.
Saturday, August 22, 2009
Triple Chocolate Pie
Crust (alternate: two 8" graham cracker pie shells)
1 cup chocolate graham cracker crumbs *
2 Tablespoons sugar
4 Tablespoons butter, melted
Filling
1/4 cup sugar
1/4 cup chocolate syrup
1 cup semi-sweet chocolate chips
8 oz. (1 package) cream cheese, room temperature
1 3/4 cups milk
3 oz. (1 package) chocolate pudding
8 oz. whipped cream or whipped topping
Topping
1/3 cup semi-sweet chocolate chips
1 1/2 Tablespoons butter
Crust
1. If making your own crust grease a 8" or 9" springform pan. Mix the graham cracker crumbs * and sugar; add butter and mix. Flatten ** in your springform pan. Bake for 7 minutes at 350 degrees. Set aside to cool.
Filling
2. Place sugar, chocolate syrup, semi-sweet chocolate chips, and cream cheese in a sauce pan on the stove (preferrably with the cream cheese on bottom) and cover for 15 minutes.
3. In a separate dish mix pudding mix and milk.
4. Stir the cream cheese mixture until fairly homogenous; add cream cheese mixture to pudding and mix with electric beater.
5. Add whipped cream -- but do not overbeat!
6. Well grease the sides of the springform pan again (this helps prevent the filling from sticking to the pan).
7. Pour mixture into springform pan or pie crusts.
8. Freeze for 4 hours, or preferrably overnight.
Topping
9. Add butter and chocolate chips to a small sauce pan on low. Stir.
10. Once mixture is melted and smooth remove from heat and allow to cool for 5 minutes.
11. Pour over the top of the triple chocolate pie and spread evenly over the top using a spatula.
12. Return to freezer for at least 10 minutes to allow chocolate shell to harden.
13. You may need to use a thin, narrow spatula around the edges to help loosen the pie from the springform pan.
14. Once removed from the springform pan you can return any leftovers to the freezer. Simply cover in plastic wrap.
So- I totally didn't have enough chocolate chips to make the chocolate shell! Oops. I think I like it better with out it though. I topped the pie with a little chocolate syrup and caramel. But I think I won't even put anything on the second pie that's in the freezer. I love it just the way it is! Perfection. It might be too sweet with the chocolate shell.
Mesquite Chicken and Bacon Bowtie Pasta
8 oz. Farfalle pasta
1 c. heavy whipping cream
3-4 chicken breasts (boneless, skinless)
2 to 3 cloves garlic, crushed OR garlic salt (I do a spoonful of crushed garlic)
1/2 tbsp pepper
1/2 c. butter
1 lb. bacon, crumpled**
1/2 c. shredded Parmesan cheese
1 (12 oz) Lawry’s mesquite marinade with lime juice**We like to cook our bacon in the oven (400 degrees, convection). Way less messy. And it’s crispy every time. Time varies, so you just have to watch it. I think it’s usually around 30 minutes. Allow to cool and then crumple.
[ directions ]
Crock pot chicken and bottle of marinade on low for 6 hours. Pull marinated chicken out of the juices, allow to cool a little bit, and shred.
Set this aside.
About a half-hour before serving, boil the pasta. In a small saucepan, melt butter, add garlic, whipping cream, pepper, parmesan cheese, and crumpled bacon. Whisk together on low heat for 3-4 minutes. In a large bowl, pour over cooked, drained pasta, add chicken and stir through. Sprinkle a little bit more shredded parmesan cheese on top.
--This recipe was soooo yummy. Dustin doesn't like cheese so I did not add the cheese to the sauce. It was still amazing. But I bet it's about 5 times more amazing with the cheese.
I baked my bacon in the oven just like she said. I lined a cookie sheet with tinfoil (easier clean up) and put it in the oven for 30 minutes. It came out burnt! I should have watched it more. But--it didn't ruin the recipe at all. It gave it a nice smokey flavor.
This pasta had such a unique flavor. I absolutely loved it! I will DEFINITELY be making this again.